Thursday, June 30

Ricotta Tortellini with Broad Bean, Tomato and Purple Basil Salad

I am a magpie. On my days off around Bristol I can't stop myself picking up (and buying - obviously) random shiny sparkly glistening gastronomic gems. This weeks haul was some fresh ricotta from Murray's Italian deli in Clevedon, some amazing purple basil from Stourhead farm shop and some local broad beans. Not too difficult to pull a nice summery dish together from this lot - try making something from the quince jelly, smoked sausage and cold pressed rapeseed oil that I bought from the Foodie festival last week!

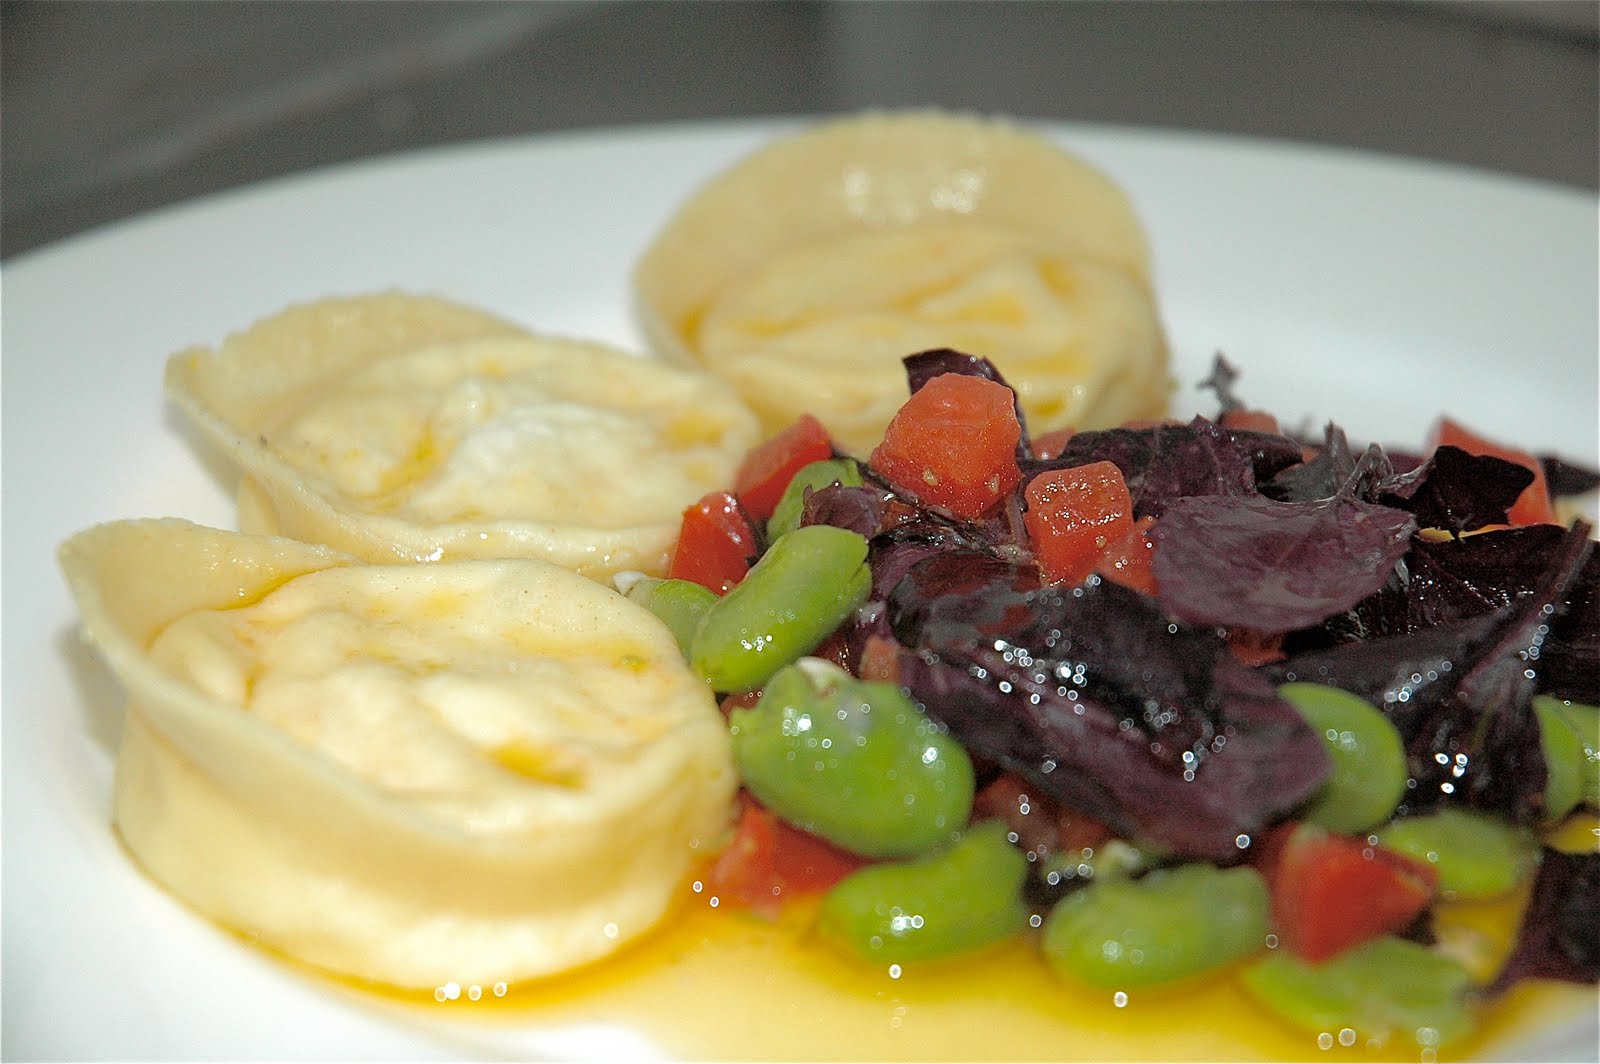
I have to show you this photo of my tortellini. I was so proud to see them all lined up and ready to cook. Over the last two years my thick, clumsy, uncoordinated excuses for fingers have become adept at making really quite passable pasta. Try making your own fresh pasta, it doesn't matter if you mess it up. Tortellini are probably the most tricky to master but an easier option is just to cut circles of dough and fold over a blob of filling to make 'half moon' ravioli. Even easier, just make fettuccine and run the salad through the pasta at the end, topping with ricotta and parmesan - lets be honest, it will taste the same. A pasta machine makes life easier but don't buy one unless you plan to use it regularly, a rolling pin and some patience works almost as well. To feed four as a starter or 2 as a main:

Ingredients:
'OO' pasta flour - 400g
Free range eggs - 4
Fresh Ricotta - 250g
Grated Parmesan - large handful
Lemon, juice and zest - 1
Broad Beans - 500g
Super ripe tomato - 1 or 2
Extra Virgin Olive Oil - 50ml
Purple (or Green) Basil - small handful
Salt and Pepper

Method:
Pasta dough is very easy to make, be brave! The quantities of egg and flour are always the same: 100g flour + 1 egg (you can scale up to any quantity of dough required). Put the flour and eggs in a food processor and blitz together with a pinch of salt until a dough forms. If it is a little dry, add a splash of olive oil. Wrap in cling-film and chill for 1/2 hour.

Pod and blanch your beans and refresh in ice cold water. Remove the leathery pods once cold and set beans aside. De-seed and chop the tomato, mix in a bowl with the olive oil, the beans, a pinch of salt and a squeeze of lemon - allow the flavours to get to know one another for 1/2 hour outside the fridge. Mix the ricotta with the parmesan, lemon zest and a little juice and season to taste.

To make the pasta using a machine - pull off 1/3 of the dough and dust with flour. Shape into a thinnish disk and begin to run through the pasta machine with the rollers set to their widest setting. Take the resulting rectangle of pasta and fold the ends into the centre. Turn the pasta square 90 degrees and run through the machine again dusting with flour as you go. Repeat 6 to 8 times until the pasta is smooth and glossy. Now start reducing the width of the rollers by one notch and run the pasta through again omitting the folding stage. Keep running it through and reducing the roller width until the pasta has been through on the thinnest setting. If you don't have a machine, knead well and use a rolling pin and try to get the dough as thin as possible.

To make tortellini, cut the rolled dough into 10cm squares and spoon a generous blob of ricotta filling into the centre of each square - to make even tortellini, make sure the filling quantity is the same each time. Using a little water and your finger, wet a semi-circle around the filling and fold the edge of the pasta nearest you, over the filling and to join the other edge furthest away from you.   Press around the filling to remove any air and seal.   Using a suitable round cutter or knife, cut around the filling leaving a 10mm edge to make 'half moon' ravioli. You can stop here if you wish? With the straight edge facing you and using your thumb, roll the filling 90 degrees away from you so that the pointy edges of the pasta are up in the air. Wet one point and pull both together into the middle and stick together.   Continue to roll the pasta away from you to release from the work surface and voila - one tortellini.   Reshape a little and place on a floured tray - repeat to make 12 in total. Fresh pasta will keep for a day or so in the fridge uncovered before it starts to discolour.   Don't worry if it dries out a bit, this is actually a good thing.

Cook the pasta for 2 mins in boiling salted water, drain and serve with the salad. Let me know how you get on - any questions happily received.


Wednesday, June 29

Posh Lamb Kebabs with Houmous, Roast Garlic Yoghurt, Chopped Salad & Harissa

Like all beer loving lads, there have been shady times in my culinary life when I have succumbed to a dirty kebab after a nights boozing (cue anecdote about Britain's funniest kebab shop name: 'Jason's Doner Van').   The sad thing is that kebabs don't have to be seedy, be made of some unidentifiable protein or resemble an Elephant's foot.    They can be low fat, packed with the nutritious good stuff and be very cost effective to make.   


There are a couple of cheats you can exercise here if you want to accelerate the progression of kebab from shopping basket to stomach.   No.1 - shop bought houmous is a very acceptable (if slightly more expensive) cheat.   No.2 - You may also substitute the garlic yoghurt for shop bought Tzatziki.    Cheat No.3 - shop bought flat breads are also OK.   Another option are the amazing Bristol made Abunoor pitta breads sold in the 'Better Food Company' shops in St Werburgh's and on White Ladies Road.


At the pub we had some Somerset lamb leg and pizza dough left over from the weekend - I just couldn't help myself, I had to put kebabs on the menu and very popular they are too (especially with several ice cold pints - old habits die hard!).   For four:


Ingredients:
Thick lamb leg steaks - 500g
Tinned Chickpeas, drained - 1x 400g tin
Tahini (Optional) - 2tbsp
Lemon Juice - 3 lemons worth
White Cabbage, finely shredded - 200g
Large Ripe Tomatoes, seeded and finely diced - 3
Cucumber, seeded removed and finely diced - 1/2
Red Onion, finely chopped - 1/2
Fresh Coriander, finely chopped - 1 small bunch
Fresh Mint, finely chopped - 1/2 small bunch
Harissa Paste - 1 tbsp
Extra Virgin Olive Oil - 150ml
Garlic - 2 heads
Quality Greek Yoghurt (Total Brand) - 1 small tub
Strong White Flour - 500g
Dried Yeast - 1 tbsp
Salt and Pepper


Method:
The night before, season your yoghurt with salt and tip into a cloth lined sieve over a bowl.   A clean Jey cloth or tea towel works well here.   Put in the fridge and allow to drain overnight -  this makes the yoghurt much thicker.


An hour before you want to eat, remove 2 cloves of garlic from the heads, foil wrap the remainder and bake at 200c for 30 mins.    Put the flour and yeast and a pinch of salt in a bowl.   Add some blood temperature water (approx 200ml) and knead well until you have a soft elastic dough.   Cover with clingfilm and leave in a warm place to prove.    Next make the houmous - tip the chickpeas, 2 cloves of garlic, the tahini, juice of 1 lemon and 100ml of the olive oil into a food processor and blend until smooth.   Season and add more lemon if required.   If the mixture is too thick add a little water.    


For the salad, mix the cabbage, tomato, coriander, mint, cucumber and onion in a bowl and refrigerate.   When the roast garlic is soft, cut through the middle of each head and squeeze out the pulp discarding the skins.   Mix into the strained yoghurt (discard the juice in the bowl) with a pinch of salt.     Last thing, mix the harissa paste with a little oil and lemon juice to make a runny oily dressing.   Right - now the cooking:


There are several ways to cook your flat bread depending on what equipment you have at home.   You can use a barbeque, griddle pan, large frying pan, grill or oven - the method is basically the same.   Knock back (knead) the doughball to remove some of the air and divide into 4.   Flour a work surface and roll out the balls to an approx 30cm circle.   Rub a little oil into both surfaces and sprinkle with salt - bake, fry or grill using a high heat for a minute or so on each side until the bread is cooked and golden in places.   Thin bread is the key to success here.


Meanwhile season and cook your lamb in a hot frying pan or on the barbeque - you want it medium really but the cooking times depend on the thickness of the lamb steaks.   Keep prodding the meat with your finger - it is medium when the outside is nicely browned but there is still a little bit of 'spring' in the middle.   Allow to rest for a few mins.     To assemble the dish, put the warm flatbread on a plate, add a spoonful of garlic yoghurt and one of houmous.   Dress the salad with lemon juice and olive oil and put a good handful on each flatbread.    Slice the warm lamb thinly and divide between the plates and dress with the fiery harissa to taste.   


The plating of this dish allows a minor experiment in behavioural science to be conducted.    The culturally evolved will tear the flat bread base into chunks and dip daintily into the houmous and yoghurt.   Others will roll up the lot and stuff into their gobs like slavering animals.   Could be an interesting test of a potential partner if you are on a first date.    Actually, what would more interesting is the type of person who would serve a kebab on a first date........Erm......I'm going to stop writing now.


Thursday, June 23

Masala Dosa - South Indian Crispy Rice Pancake


A dosa is an Indian rice pancake - a common South Indian breakfast or lunch dish, but not common at all in UK curry houses.   This is a quick dish to make and very very cheap - maybe £1 per portion.   The main effort will be to find an Indian grocers to get curry leaves and Dosa mix.   It may seem like cheating to use a ready mix, but Dosa flour is a bit of an effort to make and this dish tastes so great, who cares.    I use the 'Gits' brand that I have seen in just about every Indian supermarket (for reference I got mine at Bristol Sweet Mart)

As with many things in life, the bigger your Dosa, the more your partner will be impressed.   The ones I ate in India were 50cm in diameter, but you will be limited by the size of your frying pan.   You need a really good non-stick pan to make these (see my frying pan advice on my Chang Mai noodle recipe?).   For 4 people:

Ingredients:
Floury potato such as Maris Piper - 3 to 4 large ones
Ghee, melted butter - 4 tbsp (use veg oil here if you want a vegan outcome)
Vegetable oil for frying the Dosa
Black mustard seeds - 1 tbsp
Fresh curry leaves - 1 small handful
Onion, finely diced - 1 medium
Garlic, crushed - 3 cloves
Fresh ginger, grated - a thumb sized piece
Turmeric - 1 tsp
Salt and black pepper to taste
Dosa batter, made up as per instructions - 1 packet

Method:
Microwave the potatoes until cooked, allow to cool a little and scoop out the flesh discarding the skins.   In the oil or butter, fry onion, the black mustard seeds and curry leaves until fragrant, they will pop and crackle a bit.   Toss in the garlic and fry until golden.    Add the ginger and fry for a further minute before adding in the turmeric, potato and seasoning.  Mix well mashing the potato a bit as you go.   You should end up with a lumpy yellow mash speckled with the onion and spices.   Taste and season again if necessary.

Heat you pan and add a good glug of veg oil.   Swirl around the pan to coat then add a ladle full off batter mix.   Shake the pan to evenly coat the base.    You can add more batter mix if necessary but try to get dosa as thin as possible.   Put the pan over a high heat.   Once the batter has solidified, sprinkle the dosa liberally with a more oil and continue to cook until the underside is golden brown.   Don’t be tempted to try and free the dosa until it is golden brown or it will fall to bits, it should pop off the base of the pan when it is ready.

Remove the dosa to a plate cooked side down.   Place ¼ of the potato mix off centre on the pancake and roll the pancake loosely so that the join is underneath and the weight of the potato mix holds the pancake in a roll.   It should look like a big tube with a small amount of filling in the middle and the filling should not touch the top of the tube.

This method of cooking means that you will be serving one dosa at a time.  Before you stuff and roll the dosa, you can keep the pancakes warm in the oven then stuff and serve all at once.   However you may find it difficult to roll them – just so you know, it is acceptable to just fold the dosa over the potato mix which is much easier!

Masala dosa is traditionally served with a curry gravy called a sambar, but I prefer this with a sliced onion & tomato salad and a home made chutney for which I have provided some recipes for you to try.   

Now get stuck in.   Ruin your shirt by breaking bits off the dosa and scooping up the potato curry and chutney – you are guaranteed to get it all down you!!


Indian Style Chutneys and Raita


Now I am as partial as the next man to a bit of mango chutney and lime pickle on poppadom action.   But it is very rare indeed that you will find more chutney diversity on the supermarket shelf or on the stainless pickle tray at your local balti house.   Cyrus Todiwala of Cafe Spice Namaste (www.cafespice.co.uk) is the chutney master of the UK - if you get the chance, go eat there and have his pickle tray - seriously amazing.

If you are trying to impress, make some exciting and fresh chutneys to go with your curry.   The Masala Dosa recipe on this blog site is unfeasibly easy and quick to make so use the extra time to knock up one of these.

Coriander Chutney
A delicious, fresh chutney from South India. Serve immediately or the colour of the coriander will begin to fade.

Ingredients:
1 large bunch of coriander, approx 75g leaves,roots and stems roughly chopped
¼ can well mixed coconut milk
1 green chilli, seeds in or out, finely chopped
1 clove of garlic, chopped
Juice of ½ lemon
1 tbsp jaggery or sugar
Salt to taste

Method:
Make sure the coriander is very well washed, it tends to be quite gritty with soil.   Place all the ingredients except the salt in a blender and blend until smooth.   Add a little water if too paste like, it should be quite thin, like single cream.   Taste and season as appropriate.

Tamarind Chutney
Sweet and sour, great for dipping crispy things.   You should be able to get the jaggery and tamarind in your local supermarket.

Ingredients:

100g tamarind
150ml warm water
1 tsp cumin seeds
½ tsp black peppercorns
3 cloves
50g jaggery (palm sugar) or sugar
2 tsp fresh ginger, grated
salt

Method:
Soak the tamarind in the warm water until soft, approx 1 hour.   Roast the cumin, peppercorns and cloves in a dry pan until they smell aromatic, don’t allow them to burn.   Grind in a pestle and mortar until you have a fine powder.   Put all the ingredients in a pan and bring to the boil, cooking for 5 mins.   Push through a sieve and discard the tamarind seeds and fibres.   The chutney should be thick but pourable so add more water if necessary.   Serve immediately or make up to 3 days in advance and keep in an airtight container in the fridge.

Raita
A yoghurt and juicy vegetable dip traditionally used to cool the chilli burn of a hot dish.

Ingredients:
Quality stained Greek yoghurt such as Total brand - 200g
Red Onion, finely diced - 1/4
Cucumber, deseeded, coarsely grated and squeezed of excess juice - 1/4
Ripe Tomato, deseeded and finely chopped
Lemon Juice - a squeeze
Salt - to taste

Method:
Mix all the ingredients in a bowl and leave for half an hour before serving for the flavours to mingle.


Sunday, June 19

Roast Chicken, Artichokes, Olives, Lemon & Smoked Garlic

If like me, you find the full monty British roast a bit much for lunch and a royal pain in the arse for washing up, then maybe give this one tray roast a go.   Artichokes are in season now, the ones I bought were from Italy but they do grow in the UK.   I saw some growing in the local allotments and had to fight the urge not to pinch a couple (must not forage on allotments...must not forage...).


Artichokes are fiddly to prep - you need a stout sharp little knife and some lemons in water.    Cut the top 1/3 off the artichoke flower then start cutting around the flower working towards the stem taking off all the tough fibrous leaves preserving the tender inner core.   When you reach the stem peel the fibrous outer away and trim to approx 5 cm in length.    Next get a spoon and dig out the 'choke' - the hairy bit in the middle of the flower.    Trim up the leaves at the top now that the choke has been removed.     You want to be left with the heart of the artichoke, a few tender leaves feathering the top and an inch or so of peeled stem.   Quarter the artichokes length ways and plunge into the lemony water to stop them blackening.      If you can't be bothered with all this prep or have a hangover as I so often do, then shop bought artichokes in oil are OK.    Toss them into the roasting tray 10 mins before the end of cooking time to warm through.   For four:


Ingredients:
1 free range chicken, jointed - 2kg
Fresh Artichokes - 4
Green Olives - 150g
Unwaxed lemon - 1 large or 2 small
New potatoes such as Jersey Royal of Pembrokeshire News - 500g
Smoked Garlic (unsmoked is also fine) - 1 head
Rosemary - 2 sprigs
Extra Virgin Olive Oil - 100ml
Salt and Pepper


Method:
Heat your oven to 210c.    Pan fry your chicken in a hot pan skin side down until nicely coloured (this is optional if you want less washing up but does give a nice colour and flavour to the skin).    Halve your spuds if large - try to get them all to the same size.    Separate the garlic into cloves and gently smash leaving the skins on.   Slice your lemon.   Toss the spuds, artichoke pieces, lemon slices, garlic, olive oil and rosemary into a roomy, heavy roasting tray.   Season well with salt and pepper and mix well.   Top with the chicken pieces and roast for 45 mins or so - until the chicken is cooked at the bone and the spuds and artichokes are tender.    Give the tray a little shake occasionally during cooking and add the olives 10 mins before the end.          


That's it....no drama, just tip the lot into a large serving bowl and let people help themselves.   I served mine with a dressed green salad and some excellent sourdough with which to mop up the lemony chicken juices and squidge the roast garlic.


Friday, June 17

Pan Fried Hake, Olive Oil Mash, Puttanesca Sauce

There is much to be said for buying what fish looks good on the day and devising a dish to fit, rather than trying to buy for a specific recipe and ending up with the mediocre and expensive.    This was never truer than in Waitrose last night when there was a spanking but ignored bit of Cornish hake fillet on for £7 per kilo - a cracking bargain. I waited in line with my paper numbered ticket trying not to draw attention to said fillet and fully expecting my hake to be snapped up by another thrifty shopper. Nope - they all went for the big three (Salmon, Cod, Tuna) at nearly twice the price. Come on guys, give those species a break and try something else.   

My commercial fish supplier (Channel) tell me that Hake is just coming into season right now off the Cornish coast but most goes to Spain where they love it. It's a great fish, very light in taste and texture and with an easily crisped skin. I've paired it here with an Italian sauce that is versatile in the extreme. It goes well with pork, fishcakes, oily fish such as mackerel or sardines, mozzarella or just toss through with pasta and parmesan. The legend behind the name is that Italian prostitutes used to knock up this sauce quickly between clients. The other story is that it has the attributes of a whore: spicy, salty, satisfies your hunger quickly.....and may be a little fishy!   For four you will need:

Ingredients:
Quality tin of chopped tomatoes - 1x 400g
Garlic - 2 cloves, peeled & roughly chopped
Dried Chilli Flakes - 1 large pinch
Basil Leaves - 1 small handful
Capers - 1 tbsp drained
Anchovy Fillets from a tin or jar, drained if in oil, washed if in salt - x3
Olives, stoned and roughly chopped - 50g
Red Wine Vinegar - 2 tbsp
Sugar - 1 tsp
Hake Fillets, scaled and pin boned - 4 x 150g
Baking Potatoes (Maris) - 4 large
Good quality Extra Virgin Olive Oil - 200ml
Vegetable Oil - 50ml
Butter - 1 knob
Salt & Pepper

Method:
Prick and microwave your spuds until soft (approx 12 mins) and allow to cool a little. Get a saute pan on the heat and add a generous glug of the olive oil. When the oil is hot, throw in the chilli, chopped garlic and chopped anchovy and fry for a minute or two until the anchovy begins to melt and the garlic turns golden. Tip in the tomatoes, capers and olives and cook for 5 mins on a medium heat stirring occasionally until the sauce thickens.While the sauce is cooking, scoop out the flesh from the potato skins and mash or pass through a sieve for superior lump free mash. Season and add the remainder of the oilve oil and keep warm.   

A good tip here, in classic french cookery there is a vinegar and sugar mix called a 'Gastrique' that is used to give dishes a sweet/sour taste. The vinegar and sugar in this recipe do the same job and will lift any tomato sauce - add these to your sauce now along with your basil and remove from the heat. Season and taste your sauce - add more seasoning, vinegar and sugar to your taste and set aside for a minute.

Put a good non-stick frying pan on a medium high heat. When frying fish, you must heat the pan and the cooking medium (oil) before you add the fish. If the pan is cold when the fish goes in, the skin will stick. Add a generous glug of vegetable oil to the pan and allow to heat. Test your pan is hot enough by dipping a little corner of the fish into the pan. If should sizzle loudly but not be so hot that the oil is smoking and spitting when the fish goes in.    

If you think you are there with the temperature, season the fillets on both sides and lay the fillets into the pan, skin side down. The fresher the fish, the more the fillet will want to curl.   Push the fillets down so that the whole surface of the skin is flat to the base of the pan - use your fingers if brave or more sensibly, a fish slice. After 20 seconds or so the fillets will stay flat.   Adjust the heat to maintain a medium/hot cooking temperature and leave the fish to cook for 2 to 3 mins untouched. Toss in your butter half way through this cooking time - the butter will give a lovely colour and flavour. Fish has a tendency to 'pop off' the pan when the skin is crisp and the less agitation you give the fillet until this point, the better. If your fish is sticking a little, leave for another minute. When golden and crispy, flip your fish onto the flesh side and turn off the heat. The residual heat in the pan will cook the fish through - in the meantime begin plating the dish.

Spoon a little of the warm sauce onto the plate, a generous blob of mash and the fish fillet on top. In my fridge (and illustrated in the photo below) I found a lonely courgette and a single chorizo sausage which I pan fried and scattered about the plate - please feel free to raid your own fridge and ad lib.


Sunday, June 12

Chang Mai Style Spicy Pork and Prawn Noodles

There are times when your body cries out for something spicy and yesterday was one of those days.   A quick trip to Teoh's Oriental supermarket yielded the goods required and a Northern Thai style noodle dish was on the cards.    I cannot urge you enough to seek out these ethnic shops, there is a mind boggling treasure trove of inspiration to be had - and really cheap.    I think I spent £10 total on this dish and I could easily feed four.   You can keep this dish seasonal by varying the vegetables added to suit the time of year - try a juilliene of root vegetables in winter or a fistful of leafy stuff in spring.

To cook this dish I used my trusty and truly massive 40cm non-stick frying pan.   Most chefs will tell you that there are two or three pieces of equipment that they use day in, day out.   This pan is one of those.   Unless you cook chinese food regularly, stuff buying a wok, get one of these bad boys from Nisbets (http://www.nisbets.co.uk, product code: S339).   I cook everything in mine from massive fry-ups to spag-bol, pancakes and drop scones to searing sunday roast joints....and of course, they are fantastic for stir-fry.   To serve 3 to 4 people:

Ingredients:
Quality Pork Chop - 1x 200g
Small Cooked Prawns - 200g
Mixed crunchy vegetables such as green beans, carrot, spring onion, bok choi etc - 200g
Thai roasted chilli paste - 1 tbsp
Indonesian Sambal Olek Paste - 2 tbsp
Garlic - 2 cloves (finely minced)
Lime Juice - 1/2
Fish Sauce - 1 to 2 tbsp 
Sugar - 1 tsp
Fresh Coriander - 1 generous bunch
Thai Sweet or Italian Basil - 1 handful
Wide Rice Noodles - 200g
Vegetable Oil - 2 tbsp plus more to oil your noodles

Method:
The rule for all stir-fries is to prep your ingredients before you start.   Cook hot and quick.   So blanch off your noodles in boiling water for approx 4 mins or until just soft and nice to eat (taste one if you are unsure).   Drain and refresh in lots of cold water.   Drain again and oil the noodles with a little veg oil to stop them sticking together.

Next remove any rind and bone from your pork chop and roughly blitz in a food processor or hand chop to make a rough mince.   Wash your coriander and basil and chop the roots and stems very finely, chop the leaves more roughly and set both aside.   Slice all your veg ensuring that the longer cooking items such as carrots and onions are sliced very thinly.

Fire up the stove and heat your pan.   Add the oil and the chilli paste and begin to gently fry mashing the paste into the oil.   Next add the hard veg such as carrots etc and the garlic - fry for a couple of minutes.   Throw in the pork mince and continue to cook and break up the meat until it resembles course meaty crumbs.    Throw in all the remaining ingredients except the noodles and the herb leaves (the stems go in now) and stir fry over a hot heat for a minute or two until all is piping hot.   Toss in your noodles to warm through adding your herb leaves at the last minute to preserve their colour and fresh flavour.    Check the seasoning and add more sugar, lime or fish sauce to your taste.

Serve immediately with a cold Singha lager to cool the burn!


Monday, June 6

Salt marsh lamb, broad beans, feta, crostini, peas & shoots

I want to open my blog with no fanfare, no bravado, just a bloody great seasonal dish to celebrate the first days of summer.    I intend this blog to be honest and the recipes achievable for the moderately talented home cook. The plate and table you see in the picture is what we ate off and resides in my domestic kitchen.   The picture I took myself, later serving the stone cold plate of food to my wife to eat!

It took approx 30 mins to make having picked everything up either on the Gloucester Road or from the farmers market on Corn St in Bristol.   To serve two people you will need:

Ingredients:
Salt Marsh Lamb Cutlets - x4 (each weighing approx. 100g)
Broad Beans (un-podded weight) - 750g
Fresh Peas (or frozen at a push) - 150g
Feta Cheese - 75g
Quality Bread (Sourdough is excellent) - 1 small loaf
Extra Virgin Olive Oil - 150ml
Garlic - 1 Clove (peeled)
Fresh mint leaves- 20 leaves, finely shredded
Salt & Pepper
Pea Shoots - optional

Method:
Take your cutlets out of the fridge an hour before you want to cook to allow them to come to room temperature.

First make your crostini - thinly slice your sough-dough and generously oil with extra virgin.   The more uniform you oil the bread, the more uniform the colouration will be.   Season lightly and bake at 200c for 10 to 15 mins until completely crispy.

Pod the broad beans and peas keeping separate.  Blanch the broad beans in lots of salted boiling water for approx 2 mins depending on the size of the beans - taste one, if they are too crunchy for your taste cook for another minute or so.    Set aside then blanch the peas next for no more than 1 min.   Blitz half the peas and beans in a food processor with a little salt and pepper to make a rough puree.   

Put a good non-stick frying pan on the heat and oil and season the lamb.   Put the lamb chops back together so that they are all the same way around with the skin sides down.    When the pan is very hot, cook all the lamb chops skin side down as if they were one piece of meat.    The fat on these chops is very sweet and fantastic to eat so make sure you cook the fat until crisp and golden.   Once this is achieved, flip the chops onto the flesh and cook for 1.5 mins on each side for medium rare or a little longer if you prefer more well done.

Take the chops out of the pan and allow to rest while you plate the dish.   A note on resting meat here - resting allows the meat juices to redistribute through the flesh giving that professional uniform pink colour when you cut it open.   For rare and medium rare cooked meats, it also gives the heat time to distribute meaning the pink centre of the cutlet is warm to the tongue.

Spread the still warm pea and bean puree onto the crostini and sprinkle with crumbled feta.     Dress the whole beans and peas with olive oil, lemon, mint and lightly season.    Make a pile of peas and beans on the plate, lamb on top, two crostini per person and artfully toss over some pea shoots if using (mine came from the garden - how very worthy!).   Drizzle with a little olive oil and a little sprinkle of feta.    

I would love to hear how you get on with this dish - feedback encouraged!